Call Us: +91925476854
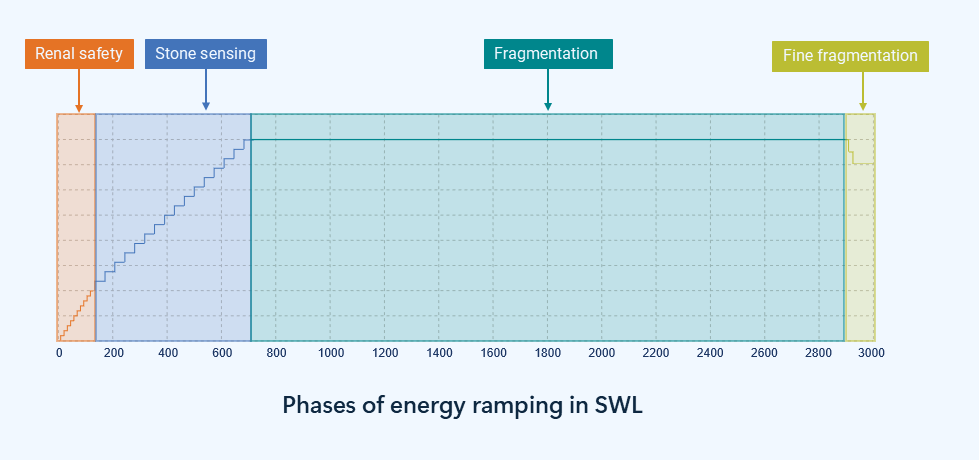
Shock Wave Lithotripsy is not a single-energy, single-speed treatment. The way energy is introduced, increased, maintained, and reduced has a direct impact on stone fragmentation, tissue safety, and overall outcomes.
Ramping is the structured progression of shockwave energy during treatment. When done correctly, it allows the kidney and the stone to respond gradually, improving fragmentation efficiency while minimizing tissue injury.
Initial low-energy shocks condition the kidney, promoting vasoconstriction and reducing tissue injury risk.
Gradual energy escalation begins, probing the stone structure and identifying zones of weakness.
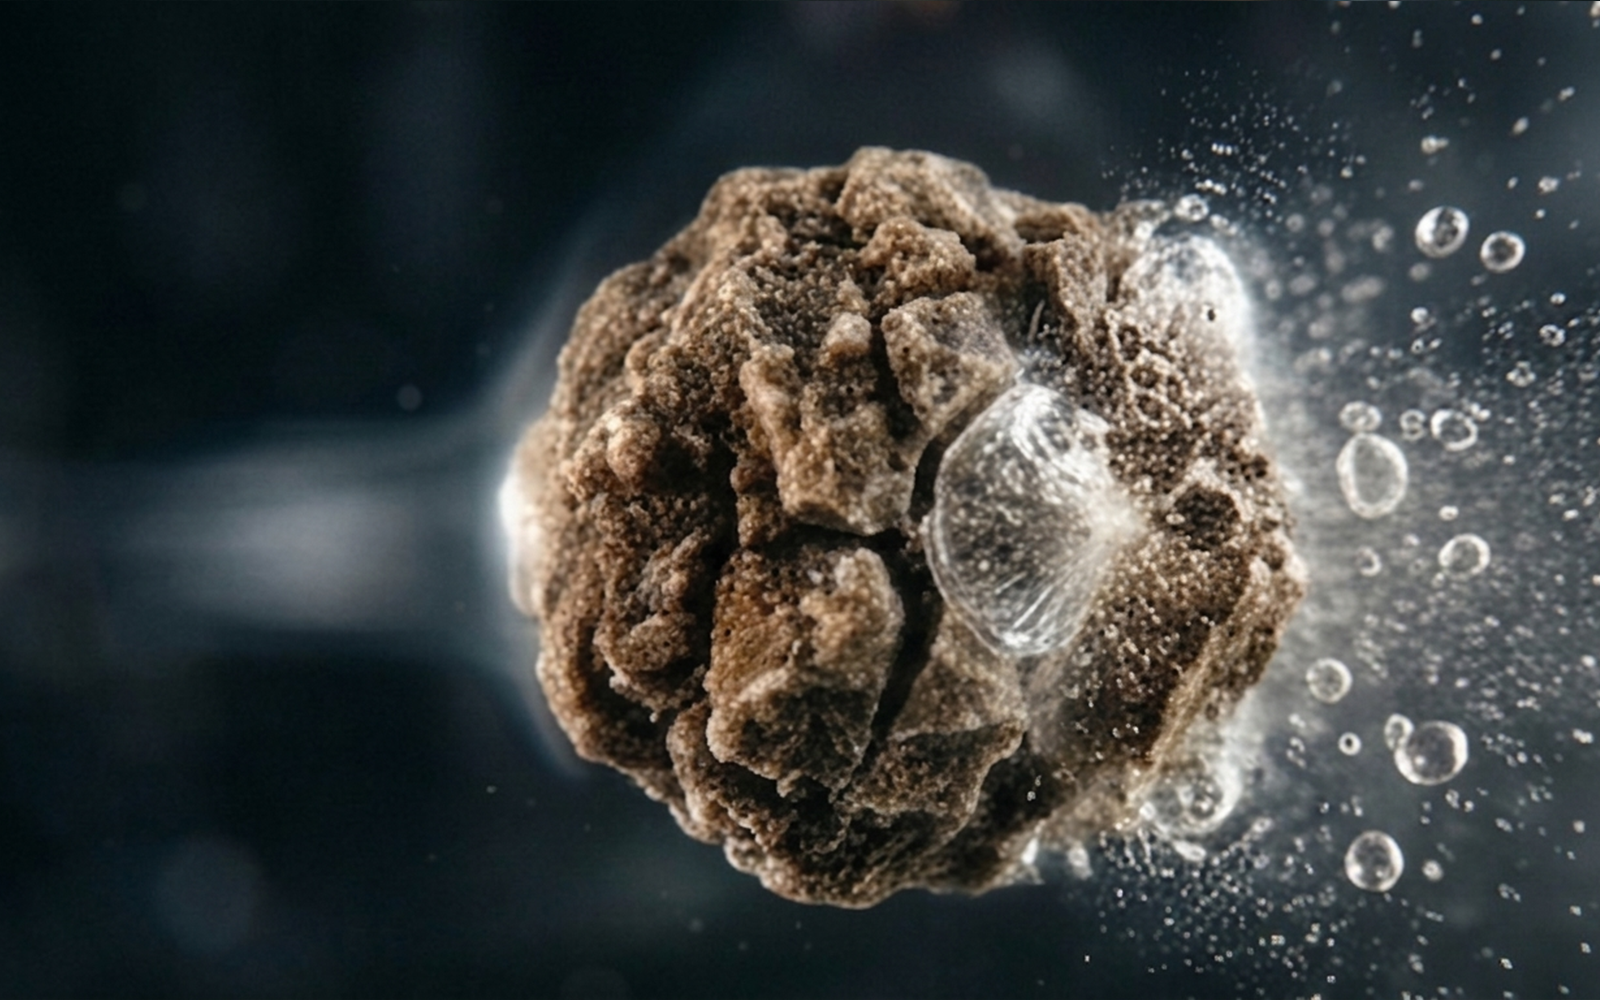
Energy reaches near-therapeutic levels, with microcracks established across the stone matrix.
High-energy shocks are applied to actively break the stone into clinically significant fragments.
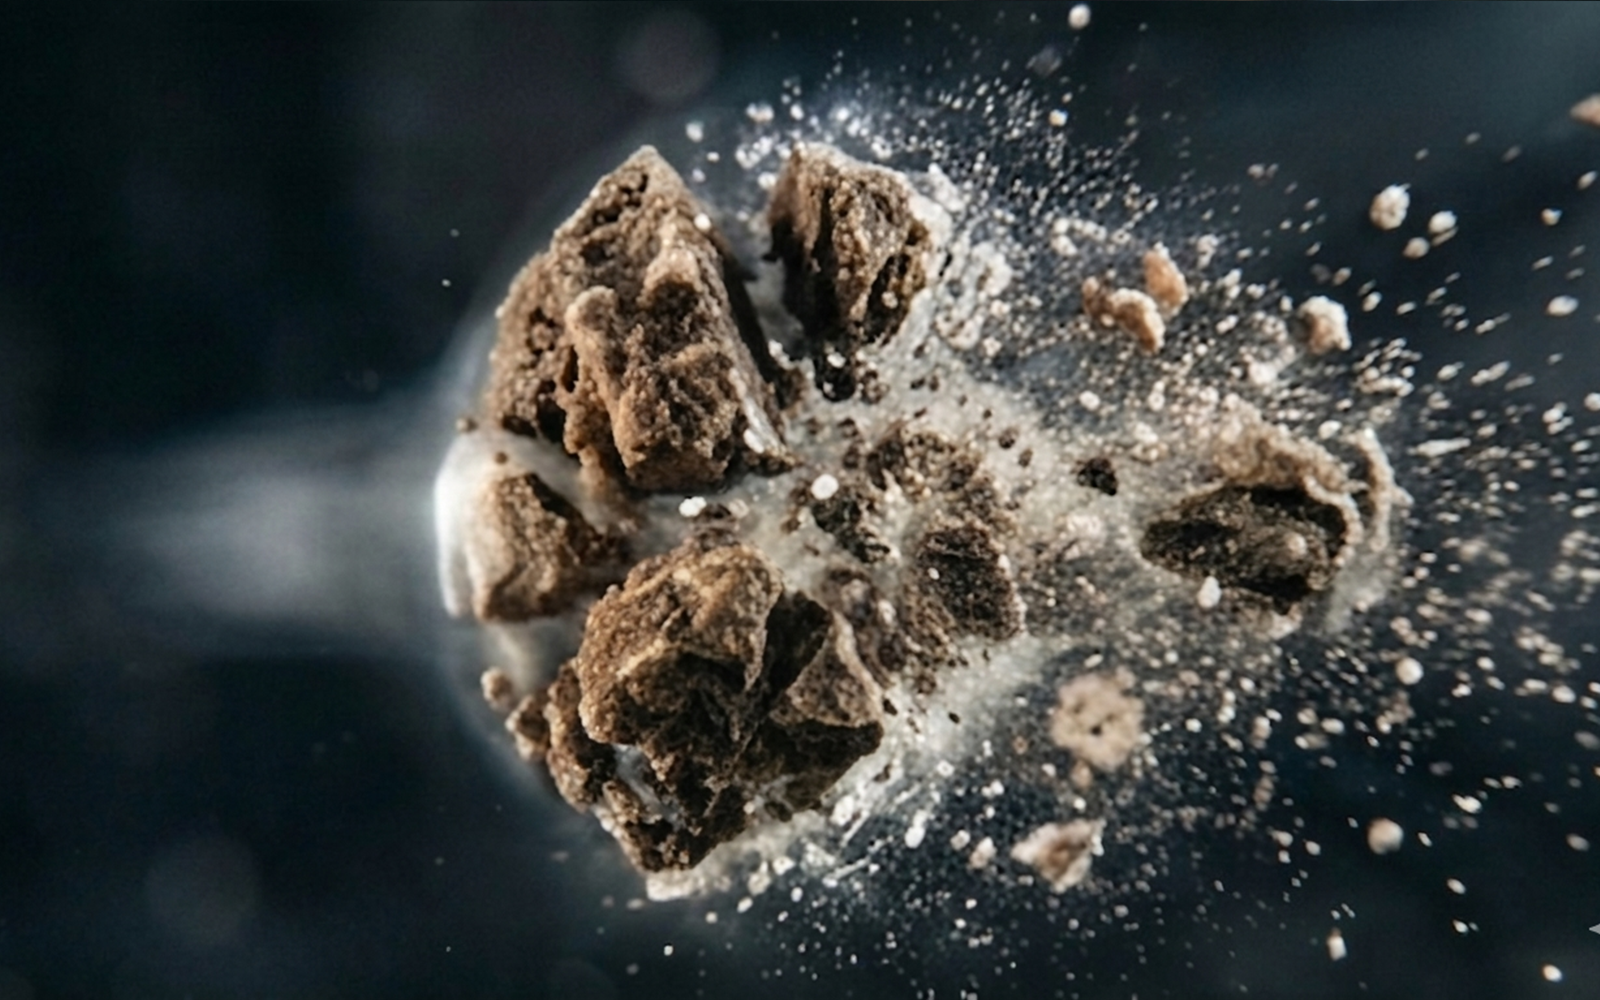
Major fragmentation is achieved, leaving smaller residual pieces ready for clearance.
Final controlled shocks refine fragments into fine particles, facilitating easier passage.